Dear Community,
A new 4.0.0 version of PrimeFaces Extensions has been released. Artefacts are available in the Maven central.
Release notes there are as usually on the project's wiki page.
This version is fully compatible with the latest PrimeFaces 5.3.
Enjoy.
Showing posts with label PrimeFaces Extensions. Show all posts
Showing posts with label PrimeFaces Extensions. Show all posts
Tuesday, October 27, 2015
Sunday, June 14, 2015
Create source maps at project build time for JavaScript debugging
If you're doing front end web development, your web resources such as JavaScript and CSS files might be minificated, transpiled or compiled from a completely different language. If you now want to debug the generated code in the browser, you can not do that because the output code is obfuscated from the code you wrote. The solution is to use source maps. A good introduction to the source map can be found in the articles "Introduction to JavaScript Source Maps", "Enhance Your JavaScript Debugging with Cross-Browser Source Maps" and "An Introduction to Source Maps".
I will try to summarize the quintessence about the source maps and concentrate on JavaScript only. Generating CSS by LESS / SASS is interesting too, but it is not yet supported by my Maven plugin I will present in this blog post. How to use a source map? In order to use a source map, your browser development tools need to be able to find it. If your generated code is JavaScript, one way to let the development tools know where to look is to add a comment to the end of the generated code which defines the sourceMappingURL - the location of the source map. For example: //# sourceMappingURL=mylib.js.map or //# sourceMappingURL=/mypath/mylib.js.map or //# sourceMappingURL=http://sourcemaps/mylib.js.map. If you now open a development tool and the source map support is enabled, the browser will stream down the source map which points to the original file and show the original file instead of generated one (minificated, compiled, transpiled, etc.). Now, you can set a breakpoint in the original file and debug it as it would be delivered with you web application! Such debugging is possible due to the fact that a source map provides a way of mapping code within a generated file back to it's original position in a source file. I found a nice bild here to visualize the entire process.

Source maps are supported in all major browser that are shipped with built-in support for source maps. If you follow my links to the articles I mentioned above, you can see some examples for Internet Expoler 11, Firefox and Google Chrome. Chrome's Dev Tools enables the source maps support by default. Simple check if the checkbox "Enable JavaScript source maps" is enabled.

If you a fan of Firefox, you should use the Firefox' Web Console (Shift + Ctrl + K) and check if the same option is enabled in settings too. Please note that Firebug doesn't support debugging by source maps. You have to use the native Firefox' Web Console as I said. Internet Explorer 11 also rocks with source maps. It has even more features - you can add source map files from your local disk. Simple right-click on a generated (e.g. compressed) file and select "Choose source map". The article "Enhance Your JavaScript Debugging with Cross-Browser Source Maps" which I mentioned above, has a lot of picture for IE and debugging TypeScript files.
Source maps can be created during your build. If you work with Node.js and npm, the best tool is UglifyJS - a popular command line utility that allows you to combine and compress JavaScript files. If you work with Maven, you can use my Maven plugin for resource optimization I wrote a some years ago and just updated for supporting source maps. It uses the superb Google Closure Compiler which offers a support for source map creation and many other cool features. Please refer the documentation of the Maven plugin to see how to set the various source map configuration options. The simplest configuration which we also use in the current PrimeFaces Extensions release looks like as follows:
//# sourceMappingURL=https://raw.githubusercontent.com/primefaces-extensions/core/master/src/sourcemap/3.2.0/timeline.js.map
The source map timeline.js.map has the content (I truncated some long lines):

Due to the Firefox built-in source map support we see the uncompressed JS file timeline.source.js. I set a breakpoint on the line with the if-statement if (index < 0). After that I clicked on an event in the Timeline component. The breakpoint was jumped up. Now, I can debug step by step and see my local and global variables on the right side. As you probably see, the variable index is shown as a (I marked it red as var index). This is a shortcoming of the current source map specification. You can read this discussion for more details.
Again, keep in mind - the source maps and original files will be only loaded when you open up the browser dev. tools and enable this support explicitly. If the dev. tools has identified that a source map is available, it will be fetched along with referenced source file(s). If a source map file is not available, you will see a 404 "not found message" in the dev. tool (not bad at all in my opinion).
That's all. My next posts will be about AngularJS and less about JSF. Stay tuned.
I will try to summarize the quintessence about the source maps and concentrate on JavaScript only. Generating CSS by LESS / SASS is interesting too, but it is not yet supported by my Maven plugin I will present in this blog post. How to use a source map? In order to use a source map, your browser development tools need to be able to find it. If your generated code is JavaScript, one way to let the development tools know where to look is to add a comment to the end of the generated code which defines the sourceMappingURL - the location of the source map. For example: //# sourceMappingURL=mylib.js.map or //# sourceMappingURL=/mypath/mylib.js.map or //# sourceMappingURL=http://sourcemaps/mylib.js.map. If you now open a development tool and the source map support is enabled, the browser will stream down the source map which points to the original file and show the original file instead of generated one (minificated, compiled, transpiled, etc.). Now, you can set a breakpoint in the original file and debug it as it would be delivered with you web application! Such debugging is possible due to the fact that a source map provides a way of mapping code within a generated file back to it's original position in a source file. I found a nice bild here to visualize the entire process.
Source maps are supported in all major browser that are shipped with built-in support for source maps. If you follow my links to the articles I mentioned above, you can see some examples for Internet Expoler 11, Firefox and Google Chrome. Chrome's Dev Tools enables the source maps support by default. Simple check if the checkbox "Enable JavaScript source maps" is enabled.

If you a fan of Firefox, you should use the Firefox' Web Console (Shift + Ctrl + K) and check if the same option is enabled in settings too. Please note that Firebug doesn't support debugging by source maps. You have to use the native Firefox' Web Console as I said. Internet Explorer 11 also rocks with source maps. It has even more features - you can add source map files from your local disk. Simple right-click on a generated (e.g. compressed) file and select "Choose source map". The article "Enhance Your JavaScript Debugging with Cross-Browser Source Maps" which I mentioned above, has a lot of picture for IE and debugging TypeScript files.
Source maps can be created during your build. If you work with Node.js and npm, the best tool is UglifyJS - a popular command line utility that allows you to combine and compress JavaScript files. If you work with Maven, you can use my Maven plugin for resource optimization I wrote a some years ago and just updated for supporting source maps. It uses the superb Google Closure Compiler which offers a support for source map creation and many other cool features. Please refer the documentation of the Maven plugin to see how to set the various source map configuration options. The simplest configuration which we also use in the current PrimeFaces Extensions release looks like as follows:
<plugin>
    <groupId>org.primefaces.extensions</groupId>
    <artifactId>resources-optimizer-maven-plugin</artifactId>
    <version>2.0.0</version>
    <configuration>
        <sourceMap>
            <create>true</create>
            <outputDir>${project.basedir}/src/sourcemap/${project.version}</outputDir>
            <sourceMapRoot>
              https://raw.githubusercontent.com/primefaces-extensions/core/master/src/sourcemap/${project.version}/
            </sourceMapRoot>
        </sourceMap>
    </configuration>
    <executions>
        <execution>
            <id>optimize</id>
            <phase>prepare-package</phase>
            <goals>
                <goal>optimize</goal>
            </goals>
        </execution>
    </executions>
</plugin>
By this way, only compressed JavaScript files will be packaged within released JAR file. Uncompressed files are not within the JAR. The JAR is smaller and free from redundant stuff. For the PrimeFaces Extensions, the source map and uncompressed files are checked in below the project root. For example, the folder with source maps and original files for the current release 3.2.0 is located here: https://github.com/primefaces-extensions/core/tree/master/src/sourcemap/3.2.0 That means, a compressed file, say timeline.js, has the following line at the end://# sourceMappingURL=https://raw.githubusercontent.com/primefaces-extensions/core/master/src/sourcemap/3.2.0/timeline.js.map
The source map timeline.js.map has the content (I truncated some long lines):
{
  "version":3,
  "file":"timeline.js",
  "lineCount":238,
  "mappings":"A;;;;;;;;;;;;;;;;;;;;AA4DqB,WAArB,GAAI,MAAOA,MAAX,GACIA,KADJ,CACY,EADZ,CAUsB,YAAtB,GAAI,...
  "sources":["timeline.source.js"],
  "names":["links","google","undefined","Array","prototype","indexOf","Array.prototype.indexOf",...]
}
It would be probably better to bring these files to a CDN, like cdnjs, but CDNs are not really intended for source maps. Another option would be a PrimeFaces repository. We will see how to handle that in the future. The next picture demonstrates how the debugging for the compressed JS file timeline.js looks in my Firefox.
Due to the Firefox built-in source map support we see the uncompressed JS file timeline.source.js. I set a breakpoint on the line with the if-statement if (index < 0). After that I clicked on an event in the Timeline component. The breakpoint was jumped up. Now, I can debug step by step and see my local and global variables on the right side. As you probably see, the variable index is shown as a (I marked it red as var index). This is a shortcoming of the current source map specification. You can read this discussion for more details.
Again, keep in mind - the source maps and original files will be only loaded when you open up the browser dev. tools and enable this support explicitly. If the dev. tools has identified that a source map is available, it will be fetched along with referenced source file(s). If a source map file is not available, you will see a 404 "not found message" in the dev. tool (not bad at all in my opinion).
That's all. My next posts will be about AngularJS and less about JSF. Stay tuned.
Wednesday, June 10, 2015
PrimeFaces Extensions 3.2.0 released
Dear PrimeFaces community,
PrimeFaces Extensions 3.2.0 has been released! This is a maintenance release which is built on top of PrimeFaces 5.2. Closed issues are available on GitHub.
Some notes to the two important changes:
Have fun!
PrimeFaces Extensions 3.2.0 has been released! This is a maintenance release which is built on top of PrimeFaces 5.2. Closed issues are available on GitHub.
Some notes to the two important changes:
- pe:ajaxErrorHandler was removed in favor of p:ajaxExceptionHandler. It was buggy and not working in the prev. release.
- Uncompressed JS files are not delivered anymore within JAR files. The
compressed JS files contain //# sourceMappingURL=... which points to the
appropriate source maps and uncompressed files for debug purpose. The source maps and uncompressed files are checked in direct in the GitHub and can be fetched from there. That means, uncompressed files have something like at the end:
//# sourceMappingURL=https://raw.githubusercontent.com/primefaces-extensions/core/master/src/sourcemap/3.2.0/primefaces-extensions.js.map
More info about source map is coming soon in my blog and the Wiki page of the Maven plugin for resource optimization.
Have fun!
Wednesday, April 22, 2015
PrimeFaces Extensions 3.1.0 released
Today, we released the PrimeFaces Extensions 3.1.0. It is built on top of PrimeFaces 5.2 and is fully compatible with PrimeFaces 5.2.
Closed issues are available on the GitHub. Please consider some enhancements in the existing components like Timeline, DynaForm, InputNumber and CKEditor.
The new deployed showcase will be available soon as usually here. The next release will be a maintenance release again.
Have fun!
Closed issues are available on the GitHub. Please consider some enhancements in the existing components like Timeline, DynaForm, InputNumber and CKEditor.
The new deployed showcase will be available soon as usually here. The next release will be a maintenance release again.
Have fun!
Monday, November 3, 2014
PrimeFaces Extensions 3.0.0 released
Today, we released the PrimeFaces Extensions 3.0.0. It is built on top of PrimeFaces 5.1 and is fully compatible with PrimeFaces 5.1.x.
There are new components: pe:countDown, pe:knob, pe:gravatar, pe:documentViewer, pe:analogClock, pe:gChart. I have blogged about them.
The new deployet showcase will be available soon as usually here. The next release will be a maintenance release. It is time for bugfixing.
Have fun!
There are new components: pe:countDown, pe:knob, pe:gravatar, pe:documentViewer, pe:analogClock, pe:gChart. I have blogged about them.
The new deployet showcase will be available soon as usually here. The next release will be a maintenance release. It is time for bugfixing.
Have fun!
Friday, September 19, 2014
Brand new JSF components in PrimeFaces Extensions
The PrimeFaces Extensions team is glad to announce several new components for the upcoming 3.0.0 main release. Our new committer Francesco Strazzullo gave a "Turbo Boost" for the project and brought at least 6 JSF components which have been successfully intergrated! The current development state is deployet on OpenShift - please look the showcase Below is a short overview about added components with screenshots.
Analog Clock. This is a component similar to digital PrimeFaces Clock, but as an analog variant, enhanced with advanced settings.

Countdown. It simulates a countdown and fires an JSF listener after an customizable interval. You can start, stop and pause the countdown.

DocumentViewer. This is JSF wrapper of Mozilla Foundation project PDF.js - a full HTML PDF reader.

GChart. This is a JSF wrapper of Google Charts API. It's the same chart library used by Google Analytics and other Google services. Please look at Organizational Chart and Geo Chart.


A small note from me: charts can be built completely by model in Java. There is only one GChartModel which allows to add any options you want programmatically. I have used the same approach for my Chart library based on Flotcharts (thinking right now about adding it to the PF Extensions). There is only one generic model with generic setters to set options (options are serialized to JSON then). Advantage: you can export a chart on the server-side, e.g. with PhantomJS. This is a different approach to PrimeFaces' charts where each chart type has a separate model class and hard-coded fix methods for options settings.
Gravatar. This is a component for Gravatar services.

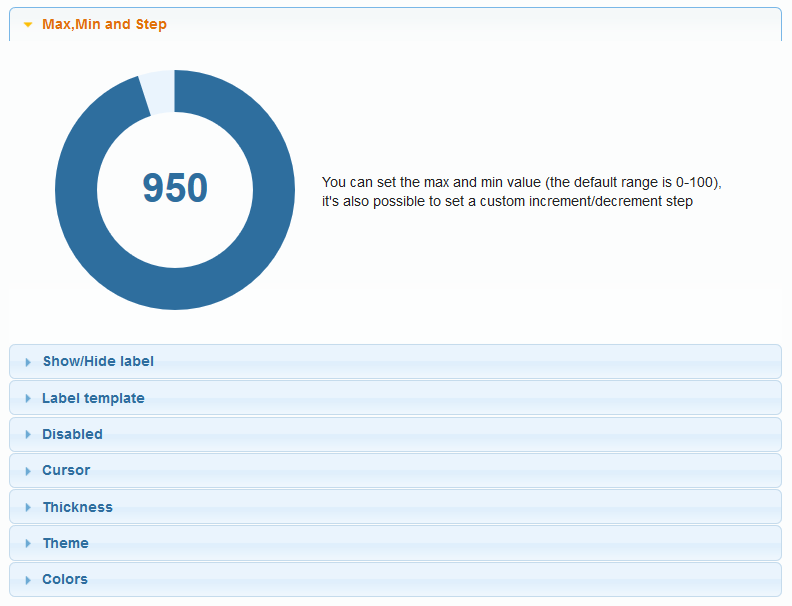
Knob. This is a nice theme-aware component to insert numeric values in a range. It has many settings for visual customization, AJAX listener and more.
Last but not least: we plan to deploy current SNAPSHOTs on the OpenShift in the future. More new components are coming soon. I intend to bring a component called pe:typeahead to the 3.0.0 too. It is based on Twitter's Typeahed. In the next post, I will explain how I have added an excellent WAI ARIA support to this great autocomplete widget. Stay tuned!
Analog Clock. This is a component similar to digital PrimeFaces Clock, but as an analog variant, enhanced with advanced settings.
Countdown. It simulates a countdown and fires an JSF listener after an customizable interval. You can start, stop and pause the countdown.
DocumentViewer. This is JSF wrapper of Mozilla Foundation project PDF.js - a full HTML PDF reader.
GChart. This is a JSF wrapper of Google Charts API. It's the same chart library used by Google Analytics and other Google services. Please look at Organizational Chart and Geo Chart.
A small note from me: charts can be built completely by model in Java. There is only one GChartModel which allows to add any options you want programmatically. I have used the same approach for my Chart library based on Flotcharts (thinking right now about adding it to the PF Extensions). There is only one generic model with generic setters to set options (options are serialized to JSON then). Advantage: you can export a chart on the server-side, e.g. with PhantomJS. This is a different approach to PrimeFaces' charts where each chart type has a separate model class and hard-coded fix methods for options settings.
Gravatar. This is a component for Gravatar services.
Knob. This is a nice theme-aware component to insert numeric values in a range. It has many settings for visual customization, AJAX listener and more.
Last but not least: we plan to deploy current SNAPSHOTs on the OpenShift in the future. More new components are coming soon. I intend to bring a component called pe:typeahead to the 3.0.0 too. It is based on Twitter's Typeahed. In the next post, I will explain how I have added an excellent WAI ARIA support to this great autocomplete widget. Stay tuned!
Friday, August 22, 2014
PrimeFaces Extensions 2.1.0 released
Today, we released the PrimeFaces Extensions 2.1.0. This is a maintenance release with many fixed issues and some new features for the existing components. The full issue list is on the GitHub.
As usually, you will find all infos on the homepage. The release is available in the Maven central repo.
Good news:
Have fun!
As usually, you will find all infos on the homepage. The release is available in the Maven central repo.
Good news:
- New snapshots and releases seem to be uploaded perodically to the public Sonatype's repository again, so that everybody can download them from there.
- We will have new "sexy" components in the next main release because we could win a new commiter for us. His name is Francesco Strazzullo and he is a creator of StrazzFaces. The plan is to adopt his components for the PrimeFaces Extensions. Furthermore, I plan to bring cool components too (although I have less free time due to my current work).
- PrimeFaces Extensions will go PRO! Thanks to Cagatay for this idea and his support. Please follow his announcement soon.
Have fun!
Monday, May 5, 2014
PrimeFaces Extensions 2.0.0 released
A brand new release of PrimeFaces Extensions 2.0.0 is available in the Maven central repo. This release is built on top of PrimeFaces 5.0. Here are some links as usually:
The next release 2.1.0 will bring new components and new stuff. The best is yet to come.
Have fun!
The next release 2.1.0 will bring new components and new stuff. The best is yet to come.
Have fun!
Wednesday, March 5, 2014
Learning Primefaces' Extensions Development
I'm glad to announce a new book Learning Primefaces' Extensions Development. The book is about various JSF components provided in the open source, community driven project PrimeFaces Extensions - an official project with additional components to the great PrimeFaces framework. PrimeFaces is a de-facto standard framework in the Java Web Development. There are already a couple of books about the PrimeFaces core: Cookbook, Started and Beginner's Guide.
What is the new book about? The book covers most important major features of the PrimeFaces Extensions. You will meet the additional JSF components, learn step-by-step how to use them in the PrimeFaces based rich JSF applications and get some ideas for writing your own components. This is a must for every JSF / PrimeFaces developer.
The book has been written by a team member of the PrimeFaces Extensions Sudheer Jonna. Thanks Sudheer for your contribution! I'm sure PrimeFaces users will be happy to hold the book in their hands.
Wednesday, January 1, 2014
PrimeFaces Extensions 1.2.1 was released with a new QRCode component
We are glad to announce the next release 1.2.1 of PrimeFaces Extensions (yes, 1.2.1 and not 1.2.0 due to some encountered issues in the newly released 1.2.0). This is a maintenance release which contains fixes for the components AjaxErrorHandler, FluidGrid, DynaForm, TimePicker, InputNumber and new features in Exporter (possibility to skip some components during export) and Waypoint (can be used now for horizontal scrolling as well).
Beside fixed issues (full list on GitHub) we added a new JSF component QRCode. QR Code is a two-dimensional barcode for multi-purpose using. Refer this article on Wikipedia if you don't know what it is.

The QR Code is generated completely on the client-side. Usage example:
The new release is available as usually in the Maven central repository. Have fun!
Edit: Çagatay Çivici told us that the demos including PrimeFaces showcase, labs and extensions crashed a couple of times, so that he had to undeploy the extensions' showcase. The current showcase is deployed to Amazon EC2 instance and is running on Tomcat 7 now. Thanks to our user sebargarcia.
Beside fixed issues (full list on GitHub) we added a new JSF component QRCode. QR Code is a two-dimensional barcode for multi-purpose using. Refer this article on Wikipedia if you don't know what it is.
The QR Code is generated completely on the client-side. Usage example:
<pe:qrCode renderMethod="canvas"
           renderMode="2"
           text="http://primefaces-extensions.github.io/"
           label="PF-Extensions"
           size="200"
           fillColor="7d767d"
           fontName="Ubuntu"
           fontColor="#01A9DB"
           ecLevel="H"
           radius="0.5"/>
Furthermore, the component library and the showcase were updated to fit JSF 2.2. The PrimeFaces team lead Çagatay Çivici has provided us his dedicated server for deployment. We would like to thank him for that! This is the same server the PrimeFaces showcase is running on. Please consider a new URL for our showcase. The old URLs are out of date (I've canceled my VPS). The showcase is running on Mojarra 2.2.x. But of course we test it on MyFaces as well.The new release is available as usually in the Maven central repository. Have fun!
Edit: Çagatay Çivici told us that the demos including PrimeFaces showcase, labs and extensions crashed a couple of times, so that he had to undeploy the extensions' showcase. The current showcase is deployed to Amazon EC2 instance and is running on Tomcat 7 now. Thanks to our user sebargarcia.
Monday, November 11, 2013
PrimeFaces Extensions 1.1.0 released. Introduction to flexible grid layout.
We are glad to announce the next release 1.1.0 of PrimeFaces Extensions. Beside fixed issues (full list on GitHub) we added a new JSF component FluidGrid. FluidGrid is a cascading grid layout component. It works by placing elements in optimal position based on available vertical space, sort of like a mason fitting stones in a wall. It is responsive, meaning the grid will reflow as the window size changes. Modern web sites are not imaginable without a responsive design. Good designed web sites look well on every device and with every screen resolution. The basic prerequisite for that is a dynamic fluid layout which fits any browser sizes. The new component FluidGrid allows to set up a nice tight grid with items that have variable heights and widths. Items inside of FluidGrid can have any content: text, images, links, input fields, etc. They can be defined in a static or in a dynamic way as in data iteration components.
Let me show some features to get a first impression what the component can. The first example demonstrates a simple usage with static items. Static items are defined by the tag pe:fluidGridItem which can be placed multiple times below the main tag pe:fluidGrid. Items can have different width / height specified by style classes. The main container for the pe:fluidGrid has the style class pe-fluidgrid and the container of the pe:fluidGridItem has the style class pe-fluidgrid-item.

After browser resizing all items are rearranged according to the available browser window size. No horizontal scrollbar appears.

Dynamic items can be put in a collection or list of FluidGridItem instances. A FluidGridItem instance contains a data object (of any data types) and an optional property type to match the type attribute in pe:fluidGridItem (see the last example with dynamic form). Dynamic items can be accessed in XHTML via the value attribute and exposed via the var attribute.
The next example demonstrates how to specifies elements which are stamped within the grid layout. These are special layout elements which will not be laid out by FluidGrid. Rather, FluidGrid will layout items below stamped elements. To specify stamped elements, use the stamp attribute which can be any search expression supported by the PrimeFaces Search Expression Framework. The XHTML code looks as follows


Now the last, the most important example, the FluidGrid was implemented for. The example demonstrates how to design a responsive dynamic grid with input fields. This is similar to the DynaForm component in PrimeFaces Extensions, but the grid is not a fixed table in this case. It is responsive! The grid layout with input fields is placed within the center pane in pe:layout. The results before and after resizing the center layout pane are shown below. Try to resize the browser window of this example to see it in action.


The XHTML code looks like
Let me show some features to get a first impression what the component can. The first example demonstrates a simple usage with static items. Static items are defined by the tag pe:fluidGridItem which can be placed multiple times below the main tag pe:fluidGrid. Items can have different width / height specified by style classes. The main container for the pe:fluidGrid has the style class pe-fluidgrid and the container of the pe:fluidGridItem has the style class pe-fluidgrid-item.
<pe:fluidGrid hGutter="10" vGutter="10">
    <pe:fluidGridItem styleClass="ui-widget-header">Item 1</pe:fluidGridItem>
    <pe:fluidGridItem styleClass="ui-widget-header w2 h2">Item 2</pe:fluidGridItem>
    <pe:fluidGridItem styleClass="ui-widget-header h3">Item 3</pe:fluidGridItem>
    <pe:fluidGridItem styleClass="ui-widget-header h2">Item 4</pe:fluidGridItem>
    <pe:fluidGridItem styleClass="ui-widget-header w3">Item 5</pe:fluidGridItem>
    <pe:fluidGridItem styleClass="ui-widget-header">Item 6</pe:fluidGridItem>
    <pe:fluidGridItem styleClass="ui-widget-header">Item 7</pe:fluidGridItem>
    <pe:fluidGridItem styleClass="ui-widget-header h2">Item 8</pe:fluidGridItem>
    <pe:fluidGridItem styleClass="ui-widget-header w2 h3">Item 9</pe:fluidGridItem>
    <pe:fluidGridItem styleClass="ui-widget-header">Item 10</pe:fluidGridItem>
    ... etc. ...
</pe:fluidGrid>

<h:outputStylesheet id="fluidGridCSS">
    .pe-fluidgrid {
        max-width: 900px;
    }

    .pe-fluidgrid .pe-fluidgrid-item {
        width:  60px;
        height: 60px;
        border-radius: 5px;
        padding-top: 0.5em;
        text-align: center;
    }

    .pe-fluidgrid-item.w2 {width: 130px;}
    .pe-fluidgrid-item.w3 {width: 200px;}
    .pe-fluidgrid-item.h2 {height: 100px;}
    .pe-fluidgrid-item.h3 {height: 130px;}
</h:outputStylesheet>
In the example we used two attributes hGutter and vGutter for horizontal and vertical space between items. The result look like
After browser resizing all items are rearranged according to the available browser window size. No horizontal scrollbar appears.

Dynamic items can be put in a collection or list of FluidGridItem instances. A FluidGridItem instance contains a data object (of any data types) and an optional property type to match the type attribute in pe:fluidGridItem (see the last example with dynamic form). Dynamic items can be accessed in XHTML via the value attribute and exposed via the var attribute.
<pe:fluidGrid value="#{fluidGridDynamicController.images}" var="image" fitWidth="true" hasImages="true">
    <pe:fluidGridItem>
        <h:graphicImage library="images" name="fluidgrid/#{image.name}"/>
    </pe:fluidGridItem>
</pe:fluidGrid>
The bean looks like
@ManagedBean
@ViewScoped
public class FluidGridDynamicController implements Serializable {

    private List<FluidGridItem> images;

    @PostConstruct
    protected void initialize() {
        images = new ArrayList<FluidGridItem>();

        for (int j = 0; j < 3; j++) {
            for (int i = 1; i <= 10; i++) {
                images.add(new FluidGridItem(new Image(i + ".jpeg")));
            }
        }
    }

    public List<FluidGridItem> getImages() {
        return images;
    }
}
The result and more details can be seen in the showcase (second use case).The next example demonstrates how to specifies elements which are stamped within the grid layout. These are special layout elements which will not be laid out by FluidGrid. Rather, FluidGrid will layout items below stamped elements. To specify stamped elements, use the stamp attribute which can be any search expression supported by the PrimeFaces Search Expression Framework. The XHTML code looks as follows
<pe:fluidGrid stamp="@(.pe-fluidgrid .stamp)" resizeBound="false" widgetVar="fluidGridWdgt">
    <div class="stamp"></div>

    <pe:fluidGridItem styleClass="ui-widget-header"/>
    <pe:fluidGridItem styleClass="ui-widget-header w2 h2"/>
    <pe:fluidGridItem styleClass="ui-widget-header h3"/>
    <pe:fluidGridItem styleClass="ui-widget-header h2"/>
    <pe:fluidGridItem styleClass="ui-widget-header w3"/>
    <pe:fluidGridItem styleClass="ui-widget-header"/>
    <pe:fluidGridItem styleClass="ui-widget-header"/>
    <pe:fluidGridItem styleClass="ui-widget-header h2"/>
    <pe:fluidGridItem styleClass="ui-widget-header w2 h3"/>
    <pe:fluidGridItem styleClass="ui-widget-header"/>
    ... etc. ...
</pe:fluidGrid>
More infos can be seen in the showcase (third use case). The next screenshots show a grid layout with a stamped element and without stamping after the button "Toggle stumped" was pressed.

Now the last, the most important example, the FluidGrid was implemented for. The example demonstrates how to design a responsive dynamic grid with input fields. This is similar to the DynaForm component in PrimeFaces Extensions, but the grid is not a fixed table in this case. It is responsive! The grid layout with input fields is placed within the center pane in pe:layout. The results before and after resizing the center layout pane are shown below. Try to resize the browser window of this example to see it in action.


The XHTML code looks like
<pe:fluidGrid id="fluidGrid" value="#{fluidGridDynaFormController.items}" var="data"
              resizeBound="false" hGutter="20" widgetVar="fluidGridWdgt">
    <pe:fluidGridItem type="input">
        <div class="dynaFormLabel">
            <p:outputLabel for="txt" value="#{data.label}"/>
        </div>
        <p:inputText id="txt" value="#{data.value}" required="#{data.required}"/>
    </pe:fluidGridItem>
    <pe:fluidGridItem type="select" styleClass="select">
        <div class="dynaFormLabel">
            <p:outputLabel for="menu" value="#{data.label}"/>
        </div>
        <p:selectOneMenu id="menu" value="#{data.value}" required="#{data.required}">
            <f:selectItems value="#{data.selectItems}"/>
        </p:selectOneMenu>
    </pe:fluidGridItem>
    <pe:fluidGridItem type="calendar" styleClass="calendar">
        <div class="dynaFormLabel">
            <p:outputLabel for="cal" value="#{data.label}"/>
        </div>
        <p:calendar id="cal" value="#{data.value}" required="#{data.required}" showOn="button"/>
    </pe:fluidGridItem>
</pe:fluidGrid>
The bean and model classes are straightforward.
@ManagedBean
@ViewScoped
public class FluidGridDynaFormController implements Serializable {

    private List<FluidGridItem> items;

    @PostConstruct
    protected void initialize() {
        items = new ArrayList<FluidGridItem>();

        List<SelectItem> selectItems = new ArrayList<SelectItem>();
        selectItems.add(new SelectItem("1", "Label 1"));
        selectItems.add(new SelectItem("2", "Label 2"));
        selectItems.add(new SelectItem("3", "Label 3"));

        items.add(new FluidGridItem(new DynamicField("First Label", null, true, null), "input"));
        items.add(new FluidGridItem(new DynamicField("Second Label", "Some default value", false, null), "input"));
        items.add(new FluidGridItem(new DynamicField("Third Label", null, false, selectItems), "select"));
        items.add(new FluidGridItem(new DynamicField("Fourth Label", "2", false, selectItems), "select"));
        items.add(new FluidGridItem(new DynamicField("Fifth Label", null, true, null), "calendar"));
        items.add(new FluidGridItem(new DynamicField("Sixth Label", new Date(), false, null), "calendar"));
        items.add(new FluidGridItem(new DynamicField("Seventh Label", null, false, null), "input"));
        items.add(new FluidGridItem(new DynamicField("Eighth Label", null, false, selectItems), "select"));
        items.add(new FluidGridItem(new DynamicField("Ninth Label", null, false, null), "calendar"));
    }

    public List<FluidGridItem> getItems() {
        return items;
    }
}

public class DynamicField implements Serializable {

    private String label;
    private Object value;
    private boolean required;
    private List<SelectItem> selectItems;

    public DynamicField() {
    }

    public DynamicField(String label, Object value, boolean required, List<SelectItem> selectItems) {
        this.label = label;
        this.value = value;
        this.required = required;
        this.selectItems = selectItems;
    }

    // getter / setter methods
    ...
}
Have fun with this release! Tip: it is also worth to check a new example for our JsonConverter. The example shows how to pre-initialize any UI forms on initial page load (GET request) with default values passed in URL. Any data types are supported (also Java Generics!).
Friday, October 4, 2013
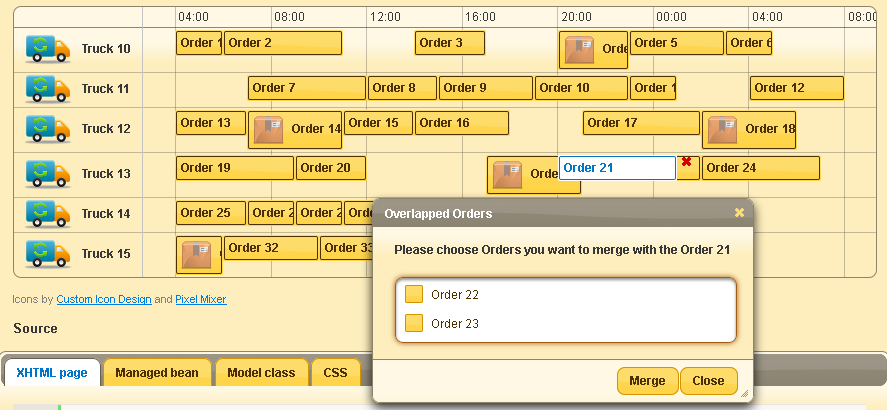
PrimeFaces Extensions: drag-and-drop feature in Timeline
Since the last release of the PrimeFaces Extensions, the Timeline component allows dragging items from the outside (an external list, etc.) and dropping them onto the Timeline. The picture shows the dragging / dropping process.

When an item is dragged and dropped, an event with an end date will be created. The end date is the start date + 10% of the timeline width. This default algorithm fits the most use cases. Tip: if events are editable, you can adjust the start / end date later by double clicking on an event.
To activate the built-in drag-and-drop feature, simple add p:ajax with event="drop" to the timeline tag.
The drop callback from the jQuery Droppable gets an ui object with a reference to the draggable element. So we can look for a closest DOM element which is a container for an UIData component.

When an item is dragged and dropped, an event with an end date will be created. The end date is the start date + 10% of the timeline width. This default algorithm fits the most use cases. Tip: if events are editable, you can adjust the start / end date later by double clicking on an event.
To activate the built-in drag-and-drop feature, simple add p:ajax with event="drop" to the timeline tag.
<div style="float:left;">
    <strong>Drag and drop events</strong>
    <p/>
    <p:dataList id="eventsList" value="#{dndTimelineController.events}"
                var="event" itemType="circle">
        <h:panelGroup id="eventBox" layout="box" style="z-index:9999; cursor:move;">
            #{event.name}
        </h:panelGroup>

        <p:draggable for="eventBox" revert="true" helper="clone" cursor="move"/>
    </p:dataList>
</div>

<pe:timeline id="timeline" value="#{dndTimelineController.model}" var="event"
             editable="true" eventMargin="10" eventMarginAxis="0" minHeight="250"
             start="#{dndTimelineController.start}" end="#{dndTimelineController.end}"
             timeZone="#{dndTimelineController.localTimeZone}"
             style="margin-left:135px;" snapEvents="false" showNavigation="true"
             dropActiveStyleClass="ui-state-highlight" dropHoverStyleClass="ui-state-hover">
    <p:ajax event="drop" listener="#{dndTimelineController.onDrop}" global="false" update="eventsList"/>

    <h:outputText value="#{event.name}"/>
    ...  other properties can be displayed too
</pe:timeline>
In this example, the objects in the list (on the left side) have properties name, start date, end date.
public class Event implements Serializable {

    private String name;
    private Date start;
    private Date end;

    // constructors, getter / setter
    ...

    @Override
    public boolean equals(Object o) {
        if (this == o) {
            return true;
        }

        if (o == null || getClass() != o.getClass()) {
            return false;
        }

        Event event = (Event) o;

        if (name != null ? !name.equals(event.name) : event.name != null) {
     return false;
        }

        return true;
    }

    @Override
    public int hashCode() {
        return name != null ? name.hashCode() : 0;
    }
}
The bean class defines the AJAX listener onDrop. The listener gets an instance of the class TimelineDragDropEvent. Besides start / end date and group, this event object also contains a client ID of the dragged component and dragged model object if draggable item is within a data iteration component.
public class DndTimelineController implements Serializable {

    private TimelineModel model;
    private TimeZone localTimeZone = TimeZone.getTimeZone("Europe/Berlin");
    private List<Event> events = new ArrayList<Event>();

    @PostConstruct
    protected void initialize() {
        // create timeline model
        model = new TimelineModel();

        // create available events for drag-&-drop
        for (int i = 1; i <= 13; i++) {
            events.add(new Event("Event " + i));
        }
    }

    public void onDrop(TimelineDragDropEvent e) {
        // get dragged model object (event class) if draggable item is within a data iteration component,
        // update event's start / end dates.
        Event dndEvent = (Event) e.getData();
        dndEvent.setStart(e.getStartDate());
        dndEvent.setEnd(e.getEndDate());

        // create a timeline event (not editable)
        TimelineEvent event = new TimelineEvent(dndEvent, e.getStartDate(), e.getEndDate(), false, e.getGroup());

        // add a new event
        TimelineUpdater timelineUpdater = TimelineUpdater.getCurrentInstance(":mainForm:timeline");
        model.add(event, timelineUpdater);

        // remove from the list of all events
        events.remove(dndEvent);

        FacesMessage msg = new FacesMessage(FacesMessage.SEVERITY_INFO,
                                            "The " + dndEvent.getName() + " was added", null);
        FacesContext.getCurrentInstance().addMessage(null, msg);
    }

    public TimelineModel getModel() {
        return model;
    }

    public TimeZone getLocalTimeZone() {
        return localTimeZone;
    }

    public List<Event> getEvents() {
        return events;
    }

    public Date getStart() {
        return start;
    }

    public Date getEnd() {
        return end;
    }
}
Please also consider the drag-and-drop related attributes dropHoverStyleClass, dropActiveStyleClass, dropAccept, dropScope. They are similar to corresponding attributes in p:droppable. There is only one difference - the datasource attribute is not needed. p:droppable in PrimeFaces has this attribute which represents an ID of an UIData component to connect with. I have never understood why we need this. It is possible to get the UIData component with a simple trick. The reading below is for advanced developers.The drop callback from the jQuery Droppable gets an ui object with a reference to the draggable element. So we can look for a closest DOM element which is a container for an UIData component.
var params = [];

// Check if draggable is within a data iteration component.
// Note for PrimeFaces team: an additional unified style class ".ui-data" for all UIData components would be welcome here!
var uiData = ui.draggable.closest(".ui-datatable, .ui-datagrid, .ui-datalist, .ui-carousel");
if (uiData.length > 0) {
    params.push({
        name: this.id + '_uiDataId',
        value: uiData.attr('id')
    });
}

params.push({
    name: this.id + '_dragId',
    value: ui.draggable.attr('id')
});

// call the drop listener
this.getBehavior("drop").call(this, evt, {params: params, ...});
In the component itself, the current dragged object is extracted by this snippet
FacesContext context = FacesContext.getCurrentInstance();
Map<String, String> params = context.getExternalContext().getRequestParameterMap();
String clientId = this.getClientId(context);

Object data = null;
String dragId = params.get(clientId + "_dragId");
String uiDataId = params.get(clientId + "_uiDataId");

if (dragId != null && uiDataId != null) {
    // draggable is within a data iteration component
    UIDataContextCallback contextCallback = new UIDataContextCallback(dragId);
    context.getViewRoot().invokeOnComponent(context, uiDataId, contextCallback);
    data = contextCallback.getData();
}

TimelineDragDropEvent te = new TimelineDragDropEvent(this, behaviorEvent.getBehavior(), ... dragId, data);
The JSF standard method invokeOnComponent does the job. Now the data object is available in TimelineDragDropEvent. The class UIDataContextCallback is a simple implementation of the JSF ContextCallback interface.
public class UIDataContextCallback implements ContextCallback {

    private String dragId;
    private Object data;

    public UIDataContextCallback(String dragId) {
        this.dragId = dragId;
    }

    public void invokeContextCallback(FacesContext fc, UIComponent component) {
        UIData uiData = (UIData) component;
        String[] idTokens = dragId.split(String.valueOf(UINamingContainer.getSeparatorChar(fc)));
        int rowIndex = Integer.parseInt(idTokens[idTokens.length - 2]);
        uiData.setRowIndex(rowIndex);
        data = uiData.getRowData();
        uiData.setRowIndex(-1);
    }

    public Object getData() {
        return data;
    }
}
Thursday, October 3, 2013
PrimeFaces Extensions 1.0.0 released
We are glad to announce the final release 1.0.0 of PrimeFaces Extensions. The full list of closed issues is on the GitHub. This release is fully compatible with the PrimeFaces 4.0 which was also released today.
Now both, PrimeFaces and PrimeFaces Extensions are in the Maven central repo. See Getting Started how to use it.
Thanks to all for contribution.
Now both, PrimeFaces and PrimeFaces Extensions are in the Maven central repo. See Getting Started how to use it.
Thanks to all for contribution.
Tuesday, September 17, 2013
Timeline component features lazy loading
The first release candidate 1.0.0.RC1 of the PrimeFaces Extensions brought one new of two planned features for the Timeline component. This component supports lazy loading of events during moving / zooming in the timeline. This makes sense when event's loading is time-consuming. Unlike Schedule component in the PrimeFaces it didn't introduce a new LazyTimelineModel. The model class stays the same - TimelineModel. Events are loaded lazy when p:ajax with event="lazyload" is attached to the pe:timeline tag. This new AJAX behaviour has several advantages in comparison to the approach with the "lazy model". It is consistent with other AJAX events such as add, delete, rangechanged, etc. You can disable / enable the "lazyload" AJAX behavior at runtime and execute a custom JS script on start / complete. Example:

On intial page load, only events in the visible time range should be lazy loaded. After moving to the right or left direction, area on the right or left side is coming into the view. Only events in this new displayed time range should be loaded. Time range with already loaded events is cached internally (read line in the diagram). When you zoom out now, you will probably have two time ranges the events should be loaded for. This is demonstrated in the 4. use case. When you zoom in, no AJAX event for lazy loading is sent. It is very smart! As you can see, the "lazyload" listener is not invoked again when the visible time range (incl. some hidden ranges defined by preloadFactor) already has lazy loaded events.
What is preloadFactor? The preloadFactor attribute of the pe:timeline is a positive float value or 0 (default). When the lazy loading feature is active, the calculated time range for preloading will be multiplicated by the preload factor. The result of this multiplication specifies the additional time range which will be considered for the preloading during moving / zooming too. For example, if the calculated time range for preloading is 5 days and the preload factor is 0.2, the result is 5 * 0.2 = 1 day. That means, 1 day backwards and / or 1 day onwards will be added to the original calculated time range. The event's area to be preloaded is wider then. This helps to avoid frequently, time-consuming fetching of events. Note: the preload factor in the diagram above was 0.
Let me show the code now. The code is taken from this live example of the deployed showcase.
I hope the code is self-explained :-).

<p:ajax event="lazyload" disabled="#{lazyTimelineController.disabled}"
            listener="#{lazyTimelineController.onLazyLoad}"
            onstart="PF('dialogWidget').show()"
            oncomplete="PF('dialogWidget').hide()"/>
And of course you can control exactly what should be executed and updated (process / update attributes). To understand how this new feature works (before posting a lot of code :-)) I sketched one diagram. Please read from top to down.On intial page load, only events in the visible time range should be lazy loaded. After moving to the right or left direction, area on the right or left side is coming into the view. Only events in this new displayed time range should be loaded. Time range with already loaded events is cached internally (read line in the diagram). When you zoom out now, you will probably have two time ranges the events should be loaded for. This is demonstrated in the 4. use case. When you zoom in, no AJAX event for lazy loading is sent. It is very smart! As you can see, the "lazyload" listener is not invoked again when the visible time range (incl. some hidden ranges defined by preloadFactor) already has lazy loaded events.
What is preloadFactor? The preloadFactor attribute of the pe:timeline is a positive float value or 0 (default). When the lazy loading feature is active, the calculated time range for preloading will be multiplicated by the preload factor. The result of this multiplication specifies the additional time range which will be considered for the preloading during moving / zooming too. For example, if the calculated time range for preloading is 5 days and the preload factor is 0.2, the result is 5 * 0.2 = 1 day. That means, 1 day backwards and / or 1 day onwards will be added to the original calculated time range. The event's area to be preloaded is wider then. This helps to avoid frequently, time-consuming fetching of events. Note: the preload factor in the diagram above was 0.
Let me show the code now. The code is taken from this live example of the deployed showcase.
<div id="loadingText" style="font-weight:bold; margin:-5px 0 5px 0; visibility:hidden;">Loading ...</div>

<pe:timeline id="timeline" value="#{lazyTimelineController.model}"
             preloadFactor="#{lazyTimelineController.preloadFactor}"
             zoomMax="#{lazyTimelineController.zoomMax}"
             minHeight="170" showNavigation="true">
    <p:ajax event="lazyload" update="@none" listener="#{lazyTimelineController.onLazyLoad}"
            onstart="$('#loadingText').css('visibility', 'visible')"
            oncomplete="$('#loadingText').css('visibility', 'hidden')"/>
</pe:timeline>
You see a hidden "Loading ..." text and the timeline tag. The text is shown when a "lazyload" AJAX request is sent and gets hidden when the response is back. The bean class LazyTimelineController looks as follows
@ManagedBean
@ViewScoped
public class LazyTimelineController implements Serializable {

   private TimelineModel model;

   private float preloadFactor = 0;
   private long zoomMax;

   @PostConstruct
   protected void initialize() {
      // create empty model
      model = new TimelineModel();

      // about five months in milliseconds for zoomMax
      // this can help to avoid a long loading of events when zooming out to wide time ranges
      zoomMax = 1000L * 60 * 60 * 24 * 31 * 5;
   }

   public TimelineModel getModel() {
      return model;
   }

   public void onLazyLoad(TimelineLazyLoadEvent e) {
      try {
          // simulate time-consuming loading before adding new events
          Thread.sleep((long) (1000 * Math.random() + 100));
      } catch (Exception ex) {
          // ignore
      }

      TimelineUpdater timelineUpdater = TimelineUpdater.getCurrentInstance(":mainForm:timeline");

      Date startDate = e.getStartDateFirst(); // alias getStartDate() can be used too
      Date endDate = e.getEndDateFirst(); // alias getEndDate() can be used too

      // fetch events for the first time range
      generateRandomEvents(startDate, endDate, timelineUpdater);

      if (e.hasTwoRanges()) {
          // zooming out ==> fetch events for the second time range
          generateRandomEvents(e.getStartDateSecond(), e.getEndDateSecond(), timelineUpdater);
      }
   }

   private void generateRandomEvents(Date startDate, Date endDate, TimelineUpdater timelineUpdater) {
      Calendar cal = Calendar.getInstance();
      Date curDate = startDate;
      Random rnd = new Random();

      while (curDate.before(endDate)) {
          // create events in the given time range
          if (rnd.nextBoolean()) {
              // event with only one date
              model.add(new TimelineEvent("Event " + RandomStringUtils.randomNumeric(5), curDate), timelineUpdater);
          } else {
              // event with start and end dates
              cal.setTimeInMillis(curDate.getTime());
              cal.add(Calendar.HOUR, 18);
              model.add(new TimelineEvent("Event " + RandomStringUtils.randomNumeric(5), curDate, cal.getTime()),
                        timelineUpdater);
          }

          cal.setTimeInMillis(curDate.getTime());
          cal.add(Calendar.HOUR, 24);

          curDate = cal.getTime();
      }
   }

   public void clearTimeline() {
      // clear Timeline, so that it can be loaded again with a new preload factor
      model.clear();
   }

   public void setPreloadFactor(float preloadFactor) {
      this.preloadFactor = preloadFactor;
   }

   public float getPreloadFactor() {
      return preloadFactor;
   }

   public long getZoomMax() {
      return zoomMax;
   }
}
The listener onLazyLoad gets an event object TimelineLazyLoadEvent. The TimelineLazyLoadEvent contains one or two time ranges the events should be loaded for. Two times ranges occur when you zoom out the timeline (as in the screenshot at the end of this post). If you know these time ranges (start / end time), you can fetch events from the database or whatever. Server-side added events can be automatically updated in the UI. This happens as usally by TimelineUpdater: model.add(new TimelineEvent(...), timelineUpdater).I hope the code is self-explained :-).

Monday, September 16, 2013
PrimeFaces Extensions 1.0.0.RC1 released
We are glad to announce the first release candidate 1.0.0.RC1 of PrimeFaces Extensions. This release is fully compatible with the PrimeFaces 4.0.RC1 (codename SENTINEL). Once the PrimeFaces 4.0 final is released, we will also release the 1.0.0 final version.
This is a big step forwards. The community can use this release with JSF 2.0 and JSF 2.2. The full list of closed issues is available on the GitHub.
Among other changes please consider the removing of ResetInput component since this functionality is now available in the PrimeFaces 4.0 and JSF 2.2. CKEditor was updated to the version 4, the Exporter and BlockUI components got many improvements. I have already blogged about some significant changes in BlockUI. The next post will be about new features in the Timeline component. It is e.g. capable to load events lazy.
Stay tuned and have fun!
Tuesday, September 3, 2013
New features in BlockUI of PrimeFaces Extensions
PrimeFaces users were worried if we will keep the BlockUI component in the PrimeFaces Extensions. Yes, we will keep it. It was done compatible with the upcoming PrimeFaces 4.0 and got some updates / new features.
The main features:
All featutes are demonstrated in the following code snippet and the screenshot

Have fun!
The main features:
- Page blocking. The entire page can be blocked if you don't define the target attribute.
- Non-centered message. A non-centered message is defined by the css and centerX / centerY attributes. Furthermore, you can use the cssOverlay attribute to style the overlay (half-transparent mask).
- Auto-unblocking. The timeout attribute is helpful for auto-unblocking. It defines time in millis to wait before auto-unblocking.
All featutes are demonstrated in the following code snippet and the screenshot
<p:commandButton value="Block this page!" type="button"
                 onclick="PF('blockUIWidget').block()"/>

<pe:blockUI widgetVar="blockUIWidget"
            css="{top: '10px', left: '', right: '10px', cursor: 'wait'}"
            cssOverlay="{backgroundColor: 'red'}"
            timeout="2000"
            centerY="false">
    <h:panelGrid columns="2">
        <h:graphicImage library="images" name="ajax-loader1.gif"
                        style="margin-right: 12px; vertical-align: middle;"/>
        <h:outputText value="This is a non-centered message. Please wait..." style="white-space: nowrap;"/>
    </h:panelGrid>
</pe:blockUI>

Have fun!
Monday, August 12, 2013
New release of Maven resource optimization plugin
I released today a new 1.0.0 version of the Maven plugin for web resource optimization.
Fixed issues:
It is available in the Maven central repository. Have fun with it!
Fixed issues:
- Thread safety of resource optimizer plugin
- Update dependencies to the Maven resource optimizer plugin
It is available in the Maven central repository. Have fun with it!
Thursday, June 6, 2013
PrimeFaces Extensions 0.7.1 released
We are glad to announce a maintenance release of PrimeFaces Extensions 0.7.1. This release only contains fixed issues. The full list is on the GitHub. Updated components are Exporter, KeyFilter, Layout, TimePicker and Timeline.
The release is already available in the Maven central repository. Getting Started is as usually here. The theme of the showcase was changed to redmond. We are normally doing this to distinguish separate releases from each other.
Now it is a good time for some new components, so we will add a couple of them. Stay tuned.
Sunday, May 5, 2013
PrimeFaces Extensions 0.7 released
We are glad to announce the new 0.7 release of PrimeFaces Extensions. This is a main release which contains a lot of improvements and bug fixes. The full list of closed issues is on the GitHub. I would like to pick up some highlights.

Timeline is highly interactive. The component provides a convenient server-side API to update its events smoothly. What does it mean? Approach for editing is similar to the PrimeFaces' Schedule, but the Schedule component provide a client-side widget's API method update() to update itself in oncomplete. The main goal is to avoid a DOM update of the component markup because is has a complex UI and can leads to flickers. The problem with update() is a separate AJAX request. So, we have two requests in the Schedule if we want to add or edit an event. The Timeline component provides a server-side API to update the component with only one request / response. So, you can update the UI on the server-side immediately when sending "update" request for a particular event. The main steps to do:

Well, this was the first design, the word "PrimeFaces" is missing :-). It should be "PrimeFaces & Extensions". The back side doesn't show buildings as some readers may think. It shows the commit history on the GitHub :-).
What is the next? The project is stable. We have very small amount of open issues (around 20). This is a right time to grow. The next main release 1.0.0 will contain 3 new components! They will have the same quality as Timeline. The expected release date is tightly coupled with the upcoming PrimeFaces 4.0. Stay tuned.
- AjaxErrorHandler
- ImportEnum
- InputNumber
Locale locale = FacesContext.getCurrentInstance().getViewRoot().getLocale();
java.text.DecimalFormatSymbols decimalFormatSymbols = new java.text.DecimalFormatSymbols(locale);
String thousandSeparator =  Character.toString(decimalFormatSymbols.getGroupingSeparator());
String decimalSeparator = Character.toString(decimalFormatSymbols.getDecimalSeparator());
- Exporter
- DynaForm
- Layout
<pe:layout options="#{layoutController.options}" ...>
@ManagedBean(eager=true)
@ApplicationScope
public class LayoutController implements Serializable {
    private String options;

    @PostConstruct
    protected void initialize() {
        LayoutOptions layoutOptions = new LayoutOptions();
        LayoutOptions panes = new LayoutOptions();
        panes.addOption("slidable", false);
        ...
        layoutOptions.setPanesOptions(panes);
         ...

        options = layoutOptions.toJson();
    }

    public String getOptions() {
        return options;
    }
}
This is a better choice in comparison to specifying options per attributes. Support of iframe acting as layout pane and updatable nested layouts were postponed to the next release.- TimePicker
- Timeline
Timeline is highly interactive. The component provides a convenient server-side API to update its events smoothly. What does it mean? Approach for editing is similar to the PrimeFaces' Schedule, but the Schedule component provide a client-side widget's API method update() to update itself in oncomplete. The main goal is to avoid a DOM update of the component markup because is has a complex UI and can leads to flickers. The problem with update() is a separate AJAX request. So, we have two requests in the Schedule if we want to add or edit an event. The Timeline component provides a server-side API to update the component with only one request / response. So, you can update the UI on the server-side immediately when sending "update" request for a particular event. The main steps to do:
- Get thread-safe TimelineUpdater instance by timeline's Id (in terms of findComponent()).
- Invoke one or many (batch mode) CRUD operations, such as add, update, delete, deleteAll, clear, on the TimelineModel with the TimelineUpdater as parameter.

Well, this was the first design, the word "PrimeFaces" is missing :-). It should be "PrimeFaces & Extensions". The back side doesn't show buildings as some readers may think. It shows the commit history on the GitHub :-).
What is the next? The project is stable. We have very small amount of open issues (around 20). This is a right time to grow. The next main release 1.0.0 will contain 3 new components! They will have the same quality as Timeline. The expected release date is tightly coupled with the upcoming PrimeFaces 4.0. Stay tuned.
Thursday, March 14, 2013
Passing complex objects in URL parameters
Imagine you would like to pass primitive data types, complex Java objects like java.util.Data, java.lang.List, generic classes, arrays and everything what you want via URL parameters in order to preset default values on any web page after the page was loaded. Common task? Yeah, but available solutions are mostly restricted to encoding / decoding of java.lang.String. The approach I will show doesn't have any limits on the data types. Only one limit is the limit of the URL size. URLs longer than 2083 characters may not work properly in old IE versions. Modern Firefox, Opera, and Safari can handle at least 80000 characters in URL.
Passing any type of objects via URL parameters is possible if we serialize objects to JSON and deserialize them on the server-side. An encoded JSON string has a valid format and this is a way to go! Well, but there is a problem. A serialization / deserialization to / from the JSON format works fine if the object is a non-generic type. However, if the object is of a generic type, then the Generic type information gets lost because of Java Type Erasure. What to do in this case? The solution I want to demonstrate is not restricted to JSF, but as I'm developing Java / Web front-ends, I'm rotating in this circle... So, let's start. First, we need a proper converter to receive URL parameters in JSON format and converts them back to Java. PrimeFaces Extensions provides one - JsonConverter.java. How it works? The following example shows how the JsonConverter can be applied to f:viewParam to convert a list of Strings in the JSON format to a List in Java.
The real world is more complicated. In the fact I've written a lot of custom converters having JsonConverter inside. So that instead of <pe:convertJson type="..." /> are custom converters attached. That subject is going beyond of this post.
Passing any type of objects via URL parameters is possible if we serialize objects to JSON and deserialize them on the server-side. An encoded JSON string has a valid format and this is a way to go! Well, but there is a problem. A serialization / deserialization to / from the JSON format works fine if the object is a non-generic type. However, if the object is of a generic type, then the Generic type information gets lost because of Java Type Erasure. What to do in this case? The solution I want to demonstrate is not restricted to JSF, but as I'm developing Java / Web front-ends, I'm rotating in this circle... So, let's start. First, we need a proper converter to receive URL parameters in JSON format and converts them back to Java. PrimeFaces Extensions provides one - JsonConverter.java. How it works? The following example shows how the JsonConverter can be applied to f:viewParam to convert a list of Strings in the JSON format to a List in Java.
<f:metadata>
    <f:viewParam name="subscriptions" value="#{subscriptionController.subscriptions}">
        <pe:convertJson type="java.util.List<java.lang.String>" />
    </f:viewParam>
</f:metadata>

<h:selectManyCheckbox value="#{subscriptionController.subscriptions}">
    <f:selectItem id="item1" itemLabel="News" itemValue="1" />
    <f:selectItem id="item2" itemLabel="Sports" itemValue="2" />
    <f:selectItem id="item3" itemLabel="Music" itemValue="3" />
</h:selectManyCheckbox>
The JsonConverter has one optional attribute type. We don't need to provide a data type information for primitives such as boolean or int. But generally, the type information is a necessary attribute. It specifies a data type of the value object. Any primitive type, array, non generic or generic type is supported. The type consists of fully qualified class names (except primitives). Examples:
"long[]"
"java.lang.String"
"java.util.Date"
"java.util.Collection<java.lang.Integer>"
"java.util.Map<java.lang.String, com.prime.FooPair<java.lang.Integer, java.util.Date>>"
"com.prime.FooNonGenericClass"
"com.prime.FooGenericClass<java.lang.String, java.lang.Integer>"
"com.prime.FooGenericClass<int[], com.prime.FooGenericClass<com.prime.FooNonGenericClass, java.lang.Boolean>>"
The string in the type is parsed at runtime. The code for the JsonConverter is available here (for readers who are interested in details). The JsonConverter is based on three other classes: ParameterizedTypeImpl.java, GsonConverter.java and DateTypeAdapter.java. The last one is a special adapter for dates because java.util.Date should be converted to milliseconds as long and back to the java.util.Date. So far so good. But how to prepare the values as URL parameters on the Java side? I will show an utility class which can be used for that. Read comments please, they are self-explained.
import org.apache.log4j.Logger;
import org.primefaces.extensions.converter.JsonConverter;
import java.io.UnsupportedEncodingException;
import java.net.URLEncoder;
import javax.faces.context.FacesContext;
import javax.servlet.http.HttpServletRequest;

/**
 * Builder for request parameters.
 */
public class RequestParameterBuilder {

    private Logger LOG = Logger.getLogger(RequestParameterBuilder.class);

    private StringBuilder buffer;
    private String originalUrl;
    private JsonConverter jsonConverter;
    private String encoding;
    private boolean added;

    /**
     * Creates a builder instance by the current request URL.
     */
    public RequestParameterBuilder() {
        this(((HttpServletRequest) FacesContext.getCurrentInstance().getExternalContext().getRequest()).getRequestURL()
            .toString());
    }

    /**
     * Creates a builder instance by the given URL.
     *
     * @param url URL
     */
    public RequestParameterBuilder(String url) {
        buffer = new StringBuilder(url);
        originalUrl = url;
        jsonConverter = new JsonConverter();

        encoding = FacesContext.getCurrentInstance().getExternalContext().getRequestCharacterEncoding();
        if (encoding == null) {
            encoding = "UTF-8";
        }
    }

    /**
     * Adds a request parameter to the URL without specifying a data type of the given parameter value.
     * Parameter's value is converted to JSON notation when adding. Furthermore, it will be encoded
     * according to the acquired encoding.
     *
     * @param name name of the request parameter
     * @param value value of the request parameter
     * @return RequestParameterBuilder updated this instance which can be reused
     */
    public RequestParameterBuilder paramJson(String name, Object value) throws UnsupportedEncodingException {
        return paramJson(name, value, null);
    }

    /**
     * Adds a request parameter to the URL with specifying a data type of the given parameter value. Data type is sometimes
     * required, especially for Java generic types, because type information is erased at runtime and the conversion to JSON
     * will not work properly. Parameter's value is converted to JSON notation when adding. Furthermore, it will be encoded
     * according to the acquired encoding.
     *
     * @param name name of the request parameter
     * @param value value of the request parameter
     * @param type data type of the value object. Any primitive type, array, non generic or generic type is supported.
     *             Data type is sometimes required to convert a value to a JSON representation. All data types should be
     *             fully qualified.
     * @return RequestParameterBuilder updated this instance which can be reused
     */
    public RequestParameterBuilder paramJson(String name, Object value, String type)
        throws UnsupportedEncodingException {
        jsonConverter.setType(type);

        String jsonValue;
        if (value == null) {
            jsonValue = "null";
        } else {
            jsonValue = jsonConverter.getAsString(null, null, value);
        }

        if (added || originalUrl.contains("?")) {
            buffer.append("&");
        } else {
            buffer.append("?");
        }

        buffer.append(name);
        buffer.append("=");
        buffer.append(URLEncoder.encode(jsonValue, encoding));

        // set a flag that at least one request parameter was added
        added = true;

        return this;
    }

    /**
     * Adds a request parameter to the URL. This is a convenient method for primitive, plain data types.
     * Parameter's value will not be converted to JSON notation when adding. It will be only encoded
     * according to the acquired encoding. Note: null values will not be added.
     *
     * @param name name of the request parameter
     * @param value value of the request parameter
     * @return RequestParameterBuilder updated this instance which can be reused
     */
    public RequestParameterBuilder param(String name, Object value) throws UnsupportedEncodingException {
        if (value == null) {
            return this;
        }

        if (added || originalUrl.contains("?")) {
            buffer.append("&");
        } else {
            buffer.append("?");
        }

        buffer.append(name);
        buffer.append("=");
        buffer.append(URLEncoder.encode(value.toString(), encoding));

        // set a flag that at least one request parameter was added
        added = true;

        return this;
    }

    /**
     * Builds the end result.
     *
     * @return String end result
     */
    public String build() {
        String url = buffer.toString();

        if (url.length() > 2083) {
            LOG.error("URL " + url + " is longer than 2083 chars (" + buffer.length() +
                "). It may not work properly in old IE versions.");
        }

        return url;
    }

    /**
     * Resets the internal state in order to be reused.
     *
     * @return RequestParameterBuilder reseted builder
     */
    public RequestParameterBuilder reset() {
        buffer = new StringBuilder(originalUrl);
        jsonConverter.setType(null);
        added = false;

        return this;
    }
}
A typically bean using the RequestParameterBuilder provides a parametrized URL by calling either paramJson(...) or param(...).
import java.io.Serializable;
import java.io.UnsupportedEncodingException;
import java.util.ArrayList;
import java.util.List;
import javax.annotation.PostConstruct;
import javax.faces.bean.ManagedBean;
import javax.faces.bean.SessionScoped;

/**
 * UrlParameterProvider bean.
 */
@ManagedBean
@SessionScoped
public class UrlParameterProvider implements Serializable {

    private String parametrizedUrl;

    @PostConstruct
    protected void initialize() {
        RequestParameterBuilder rpBuilder = new RequestParameterBuilder("/views/examples/params.jsf");
        try {
            List<String> subscriptions = new ArrayList<String>();
            tableBlockEntries.add("2");
            tableBlockEntries.add("3");

            // add the list to URL parameters with conversion to JSON
            rpBuilder.paramJson("subscriptions", subscriptions, "java.util.List<java.lang.String>");

            // add int values to URL parameters without conversion to JSON (just for example)
            rpBuilder.param("min", 20);
            rpBuilder.param("max", 80);
        } catch (UnsupportedEncodingException e) {
            throw new RuntimeException(e);
        }

        parametrizedUrl = rpBuilder.build();
    }

    public String getParametrizedUrl() {
        return parametrizedUrl;
    }
}
Using in XHTML - example with h:outputLink
<h:outputLink value="#{urlParameterProvider.parametrizedUrl}">
    Parametrized URL
</h:outputLink>
Once the user clicks on the link and lands on the target page with the relative path /views/examples/params.jsf, he / she will see a pre-checked h:selectManyCheckbox.The real world is more complicated. In the fact I've written a lot of custom converters having JsonConverter inside. So that instead of <pe:convertJson type="..." /> are custom converters attached. That subject is going beyond of this post.
Subscribe to:
Posts (Atom)